Capture Settings
Capture settings include the following configurations:
Binning Mode
The binning mode settings interface is shown in Figure 1:

The camera provides a 2X2 Binning mode, which merges 4 pixels into 1 pixel, resulting in 1/4 the pixel resolution compared to non-Binning mode. Activating Binning mode significantly increases the capture speed, though not to four times that of the non-Binning mode. Although the X/Y pixel resolution in Binning mode is significantly reduced, the Z-axis repeatability precision actually improves. Additionally, Binning mode has lower system power consumption and heat generation compared to non-Binning mode under the same other settings.
If users have lower requirements for pixel resolution, it is recommended to enable Binning mode.
Exposure Mode
The exposure mode settings interface is shown in Figure 2:

The available exposure modes are displayed in Figure 3:

Exposure modes include the following four:
-
Manual
Users specify the number of exposures and the exposure intensity for each. If the number of exposures exceeds one, multiple exposures are HDR fused to output a merged 3D point cloud.
-
Manual Repeat
Users specify the number of exposures, using the same exposure intensity for each. If the number of exposures equals one, the result is the same as a single exposure in manual mode; if more than one, the multiple 3D point clouds obtained are averaged to output an averaged 3D point cloud. This mode is suitable for applications where time is relatively abundant and high repeatability precision is required.
-
Specified Number Auto Exposure (Auto NHDR)
Users specify the number of exposures, and the hardware automatically generates the most suitable exposure intensity. If the specified number of exposures is more than one, it outputs an HDR fused point cloud. This mode is suitable for scenarios where the test object is determined but its surface may change.
-
Specified Quality Auto Exposure (Auto PHDR)
Users specify the imaging quality, and the hardware autonomously decides the number of exposures and the exposure intensity for each. If the number of exposures exceeds one, an HDR fused point cloud is output. If the specified imaging quality cannot be achieved, the exposure with the highest achievable imaging quality is used. This mode is suitable for scenarios where the test object is uncertain.
Number of Exposures
The number of exposures settings interface is shown in Figure 4:

The available number of exposures is displayed in Figure 5:

One exposure, using a single exposure intensity for capturing;
Two exposures, using two different exposure intensities for capturing;
Three exposures, using three different exposure intensities for capturing;
Single exposure is the most basic exposure mode, using a single set exposure intensity for capturing.
Multiple exposures are an effective way to enhance 3D imaging effects. Averaging multiple 3D point clouds with the same exposure intensity can achieve higher repeatability precision; fusing multiple 3D point clouds with different exposure intensities can achieve better imaging completeness.
Exposure Intensity
Exposure intensity affects the brightness of the camera exposure, controlled in the following two ways:
- Manual Control
- Automatic Exposure
Manual Control
When the exposure mode is set to Manual/Manual Repeat, exposure intensity can be manually controlled. The manually controllable exposure intensities are as follows:
- 2D Exposure Intensity (Intensity2D)
- 3D Exposure Intensity (Intensity3D)
2D Exposure Intensity (Intensity2D)
The 2D exposure intensity settings interface is shown in Figure 6:

The camera supports setting the exposure intensity for grayscale images separately, allowing adjustment of brightness in 3D working mode and 2D white lighting.
3D Exposure Intensity (Intensity3D)
When the exposure mode is set to manual, the exposure intensity value can be adjusted for each exposure, as shown in Figure 7:
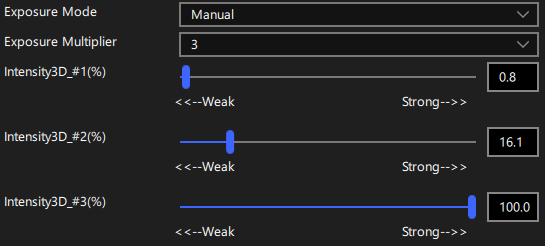
In the Manual Repeat mode, each exposure will use the first 3D exposure intensity value.
Automatic Exposure
When the exposure mode is set to Specified Number Auto Exposure (Auto NHDR)/Specified Quality Auto Exposure (Auto PHDR), the 3D camera will not use the manual mode intensity values, but rather use the exposure intensity determined automatically by the hardware.
The settings for the automatic exposure mode are of two types:
-
Priority
By setting the priority value, users can adjust the weight of the automatic exposure evaluation function. A value of 0 prioritizes completeness, while 7 prioritizes repeatability precision. As shown in Figure 8:

-
Quality Threshold
When in Specified Quality Auto Exposure mode, customers specify a quality threshold, and the hardware finds settings that can meet the quality threshold with the fewest exposures. As the quality threshold value increases, the evaluation process for the exposure settings becomes stricter, and the score decreases. Therefore, after adjusting the priority, it may be necessary to readjust the quality threshold.
The quality threshold settings interface is shown in Figure 9:

When the exposure mode is set to Specified Number Auto Exposure or Specified Quality Auto Exposure, The area below the 'Quality Threshold' displays the final exposure parameters (number of exposures and intensity for each exposure) used in the automatic exposure, as well as the predicted quality score.
The automatic exposure result feedback interface is shown in Figure 10:

User Gain
The user gain settings interface is shown in Figure 11:

User gain allows for a trade-off between speed and repeatability precision in 3D capturing. A higher user gain achieves a faster capture speed, lower repeatability precision, and reduced heat generation.
After adjusting user gain, users do not need to adjust exposure intensity to compensate for the gain's impact on exposure results. The hardware will automatically adjust the exposure time based on the gain value during exposure.
Flicker Suppression
The flicker suppression parameter settings interface is shown in Figure 12:

The available flicker suppression modes are displayed in Figure 13:

Setting the flicker suppression mode, when activated, can reduce interference from ambient light during capturing. The default is Off, with options for 50Hz and 60Hz modes, selected based on the frequency of the ambient light.